About Me
- Spud's Customs
- Stockport, United Kingdom
- Spud is obsessed with all things wheeled, both with an without engine's. 2006 Open class uk champion at Boardercross racing mountain boards, his knee's have since given up and he spends more time on his bikes both with and without engines.
Sunday, 22 April 2012
Finally there's been a bit more progress on the tank, the bottom and the two front panels are fully welded on, I've checked the welding as best I can at this stage by going into a pitch black room and shining a super bright LED down the welds. I'm still not sure if it will hold petrol but I'll test with soapy water and some air once I've welded the top of the tank on, fuel tap fitting in and tank filler on.
I got a lucky break the other day and found the custom fasteners website, they have a weld in bayonet style petrol tank inlet for £4.95 and appropriate tank caps for £9.95, not bad.
Friday, 20 April 2012
It lives
Finally got this bad boy through an MOT and on the road. Had to ditch the battery eliminating capacitor I'd fitted, and go back to a battery, because the indicators have 21w bulbs and the front and rear lights were dimming when the indicators came on. Good job I didn't get carried away and start chopping off all the mounting points for the battery like I nearly did. All is not lost tho, I plan on fitting LED indicators (along with appropriate flasher relay of course) and seeing if that solves the issue so I can ditch the battery again, clean up the lines of it all and lose a bit of weight, although to be honest, if I take a dump before I go for a ride there will probably be an equivalent weight loss. Still it does look smart without the battery.
Tuesday, 10 April 2012
Monday, 12 March 2012
Time for an update, starting to move house and lots of DIY at home have been getting in the way of project time but thanks to Wednesday nights at college I've made a bit of progress on the tank


I've a fake oil tank effort to cover the battery that goes behind the bottom of the seat tube no pics of that as yet but I'll get em up soon.
Friday, 9 March 2012
DIY stops play
Monday, 20 February 2012
Sunday, 15 January 2012
The bars and the big reveal
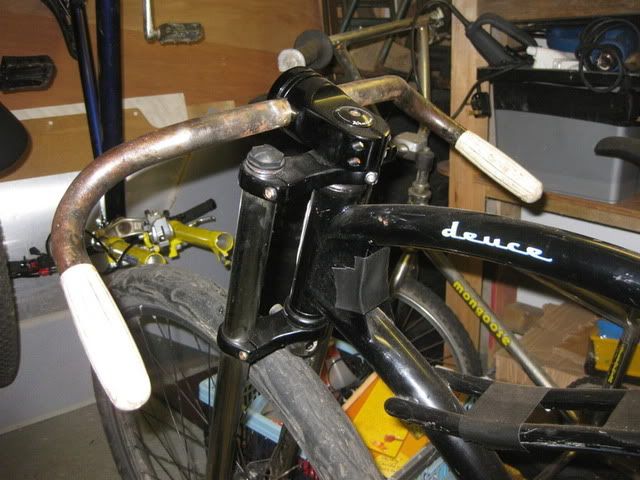
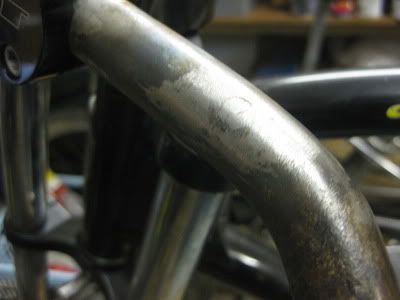
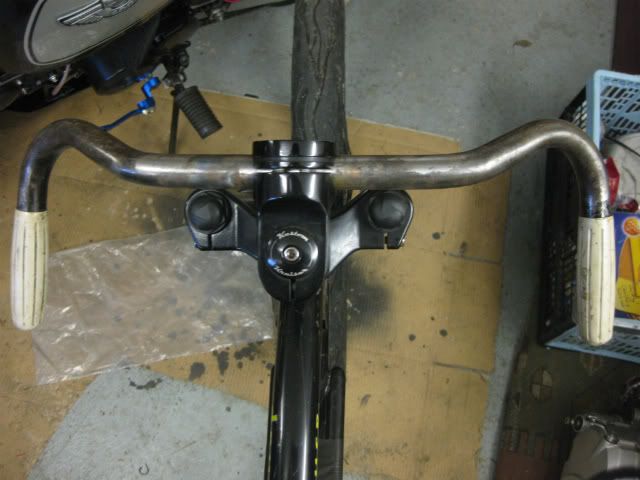
The bars, well these came from a mates shed along with the seat. Originally from an old bike with rod brakes, the rods were long gone but the lugs on the bars were still there an the stem was brazed to the bars. I was very surprised to find that the lugs for the rods un screwed from the bars and a little hemispherical nut fell out the end of the bars once the lugs were fully un screwed, a little heat from a blow torch was a help here as they were badly rusted.
The stem was a little harder to remove. I cut a slit along the stem in two places half expecting to find the bars were in two halfs but they weren't. I applies heat to the stem where it was round the bars with an oxy acetalene torch to melt the braze, then with the bars clamped firmly in a vice and a thick welding gauntlet I was able unpeel the stem from round the bars. The double slitting of the bars was a bi mistake as I was left with a piece left stuck to the bars, more heat and some screw driver prizeing action helped get rid of it. All I had to then was weld up the holes from the lugs, which I did with the oxy, my first time properly gas welding and it came out ok with a bit of cleaning up. Here's the finished product,
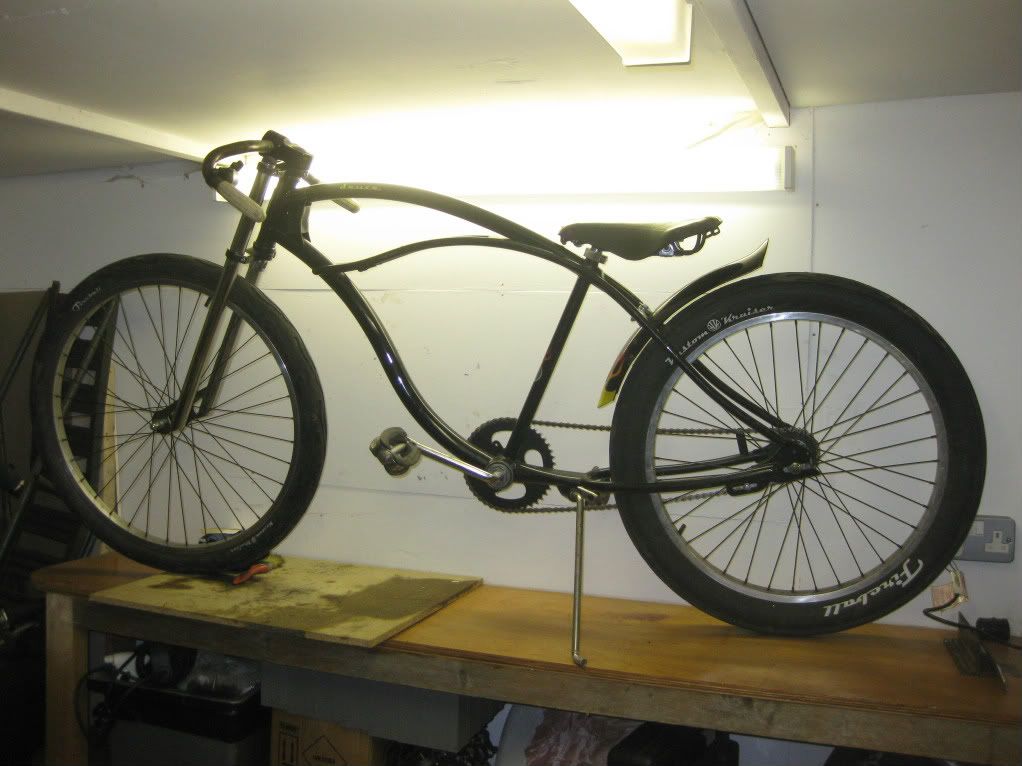
Well that's a lot of the first mods covered so I guess its time for the big reveal to show you the full bike as it stands so far
The stem was a little harder to remove. I cut a slit along the stem in two places half expecting to find the bars were in two halfs but they weren't. I applies heat to the stem where it was round the bars with an oxy acetalene torch to melt the braze, then with the bars clamped firmly in a vice and a thick welding gauntlet I was able unpeel the stem from round the bars. The double slitting of the bars was a bi mistake as I was left with a piece left stuck to the bars, more heat and some screw driver prizeing action helped get rid of it. All I had to then was weld up the holes from the lugs, which I did with the oxy, my first time properly gas welding and it came out ok with a bit of cleaning up. Here's the finished product,
Well that's a lot of the first mods covered so I guess its time for the big reveal to show you the full bike as it stands so far
Subscribe to:
Posts (Atom)