So I left off last time saying that the support pieces from the shock mount up to the sub frame loop were taking ages, and they did, but eventually I got them sorted and here they are.

I then proceeded to make a bit of a meal of welding them on which in turn led to a weld grind weld grind weld grind marathon, but that was kind of the point of doing this, I'm learning, on a nice little bike that I'm not too fussed about being a perfect show bike.
I've also knocked up some indicator mounts to mount on the indicators of the back of the shock
mounts.
Once I was finally happy with the welding on the loop and supports, I started on the mounting tabs for the seat base. After much deliberation I went for two bolts through flat bar at the front of the frame and a single tab at the top of the loop.

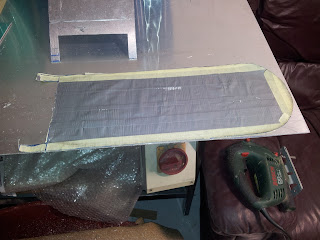
With the seat base mounts in place I started on the seat base using 3mm aluminium. I made a template by wrapping tape over the frame tubes then drawing the centre line of the tubes onto the tape to give me the outline of the seat base. I ended up making 2 seat bases as I want to have a go at making quite fancy shaped seat and a plain seat to get the bike back on the road which is taking long enough as it is.
With the seat base finished I fitted some riv nuts so I can bolt it down to the bike.
Next up was time to get some padding on the base, I had no idea how long this was going to take, with the electric carving knife I wanted to borrow falling through, I had to use a big kitchen knife, stanley blades and my dremmel to cut and shape the foam. the front end was obviously the hardest to get to fit, so it was trimm offer up and repeat and repeat and repeat. I got the rest of the shape by cutting the edge off with a stanley blade then sanding the foam to round out the new edges.

I've also spent far too long making a little bracket for the rear light and throwing some paint on the bare metal. Its now wired up and running again and just (ha ha yeah just) needs the base covering.
But I'm bloody well chuffed with it so far.


Sorry I ment that in this last post it was looking right tidy not the earlier post when it's guts was hangin out.
ReplyDelete